Labels

Sunday, January 8, 2012

White Bean & Kale Soup

When I was a kid, my grandmother used to make a navy bean soup with ham. I used to look forward to that with some homemade cornbread dripping with butter. Nothing was better on a winter's day.


Even though this has been a mild January, I was inspired by that memory of my grandmother's soup this week, and started craving a different type of bean soup - White Bean and Kale. This perfect-for-winter soup is rich, hearty and goes well with cornbread, a good crusty roll or any other bread that you can use to sop up the wonderful broth. Plus, it smells amazing when cooked all day in the crock pot. Here's my vegan-style take on this Italian classic:


White Bean and Kale Soup


Ingredients:

  • 1 pound dry cannellini beans (sorted and soaked overnight)
  • 2 tablespoons olive oil
  • 2 stalks celery, finely diced
  • 2 small onions, coarsely chopped
  • 2 cups carrots, coarsely chopped
  • 4 cloves garlic, minced
  • 5 cups vegetable stock
  • 1 quart water
  • 3 teaspoons sea salt
  • 1/2 teaspoon freshly ground black pepper
  • 1 teaspoon fresh rosemary, chopped
  • 1 large bunch kale, stems and center ribs discarded, coarsely chopped


  1. Heat olive oil in saute pan over medium high heat, and saute celery and onions together with one teaspoon of the salt till soft and fragrant (5 minutes)
  2. Add garlic and saute for one minute
  3. Place soaked beans, stock, water, the onion/celery/garlic mixture and the rest of the ingredients (EXCEPT the kale!) in the crock pot, give it a stir, cover and cook for 6-8 hours
  4. Add the kale in for the last 15-20 minutes so that it becomes tender without overcooking
  5. Adjust seasonings and enjoy with some good bread


If you don't have a crock pot, place ingredients in large stock pot. Bring everything to a boil, then reduce to simmer for about an hour  uncovered (until beans are tender). Add kale for last 15-20 minutes.

For non-vegans/vegetarians, add a good sized piece (2-3 inches) of Parmigianna cheese rind to the soup while it's cooking, and maybe add in some sliced, browned smoked sausage as well.

(Note: Like most soups, this is best if made a day or two ahead. Be sure to cool soup completely uncovered, then refrigerate covered. If the soup becomes too thick, you can thin it with a little water or vegetable stock.)

Monday, January 2, 2012

Vegan Spaghetti Squash Casserole

OK, I know the word "casserole" brings up visions of church basement suppers and family get-togethers, but this one has a little twist in that the shell of the spaghetti squash becomes the dish that it's served in. I saw a version of this topped with mozzarella and parmesan cheeses on Diners, Drive-Ins and Dives (Guy Fieri rocks!) and decided to give it a shot, with a vegan twist. It's a pretty easy recipe, and super-tasty!


Vegan Spaghetti Squash Casserole


Ingredients:


  • 1 medium-to-large spaghetti squash
  • Extra virgin olive oil
  • 2 cloves garlic, minced
  • 1 large zucchini, diced
  • 1 cup mushrooms, sliced
  • 1 red bell pepper, diced
  • 1 leek, sliced (white and green parts)
  • 1 24 oz. jar vegan marinara sauce
  • 1 cup vegan panko bread crumbs
  • Salt and pepper


1. Preheat oven to 375
2. With sharp knife, carefully cut spaghetti squash in half lengthwise and scrape out seeds
3. Bake, cut-side down, on foil-lined cookie sheet for approx. 40 minutes (once you can pierce flesh with fork, it is done)
4. Let squash cool for approx. 10 minutes, then using fork, carefully scrape out "strands" of squash into a bowl moving from end to end, leaving about 1/4 inch of the squash in the shell (not only will this provide structure to the shells when they are being baked, but it's also very satisfying to scrape the "spaghetti" from the shell as you eat). Retain the squash shell halves.

5. In large saute pan, heat 2 tablespoons olive oil over medium-high heat
6. Saute garlic in oil until fragrant, taking care not to burn

7. Saute zucchini and mushrooms until just tender (approx. 5 minutes)

8. Add a dash of salt and diced red pepper and continue sautéing approx. 5 minutes

9. Add leeks and continue to saute until leeks soften and begin to wilt

10. Add in approx. 1 1/2 cups of marinara and toss till mixed

11. Add spaghetti squash and toss with vegetable mixture, adding just enough sauce to coat mixture and adding salt and pepper to taste

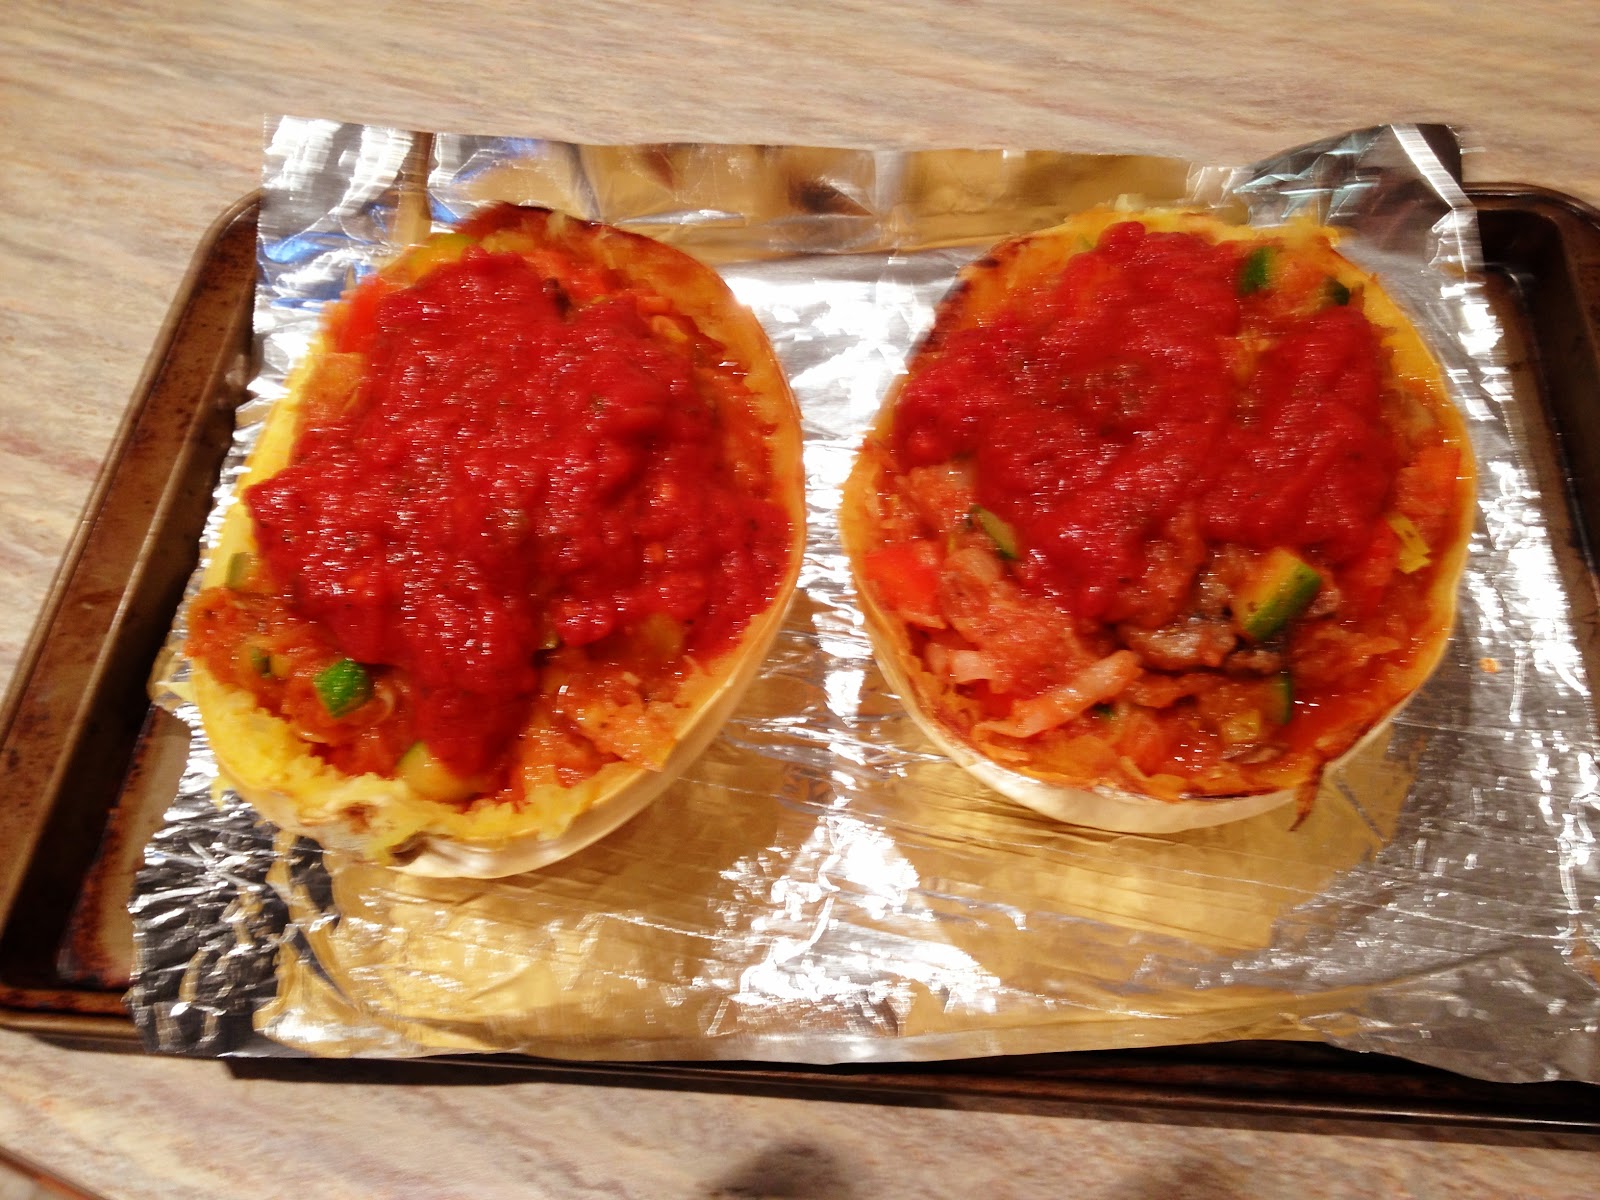
12. Divide mixture into squash shells, topping with remainder of marinara sauce

13. Mix panko bread crumbs with approx. 2 tablespoons of olive oil (panko should be moistened, but not mushy)
14. Spread bread crumb mixture over top of "casseroles" (sorry about the blurry photo - I was getting excited!)

15. Bake at 375 for 20-30 minutes (panko bread crumbs should be golden brown and toasty and marinara should be bubbly)
16. Carefully remove each "casserole" to plates and enjoy! (no photos available - we ate it too fast!)

Friday, December 30, 2011

Brussels Sprouts Panini

I hope you took my recommendation to make extra brussels sprouts, because this is my favorite way to eat the leftovers! It's a very simple, healthy lunch served with a fresh salad.


Ingredients:

  • 6" baguette, italian roll or other crusty bread
  • 1 cup leftover Brussels Sprouts
  • 2 slices Provolone cheese
  • 2 tablespoons extra virgin olive oil
  • Cooking spray


Preheat a sandwich press or panini grill to medium high. Slice bread in half lengthwise and drizzle with olive oil. Place 2 slices of Provolone cheese on bread, then arrange brussels sprouts on top of cheese. Press sandwich lightly with your hands, then place on grill sprayed with cooking spray. Close sandwich press and grill for 3-4 minutes, remove and slice in half on diagonal. Yum!

The BEST Brussels Sprouts

I admit it...brussels sprouts used to freak me out. Don't get me wrong, I've always LOVED these tasty little morsels, even as a kid. I used to pretend that I was eating miniature cabbages.


What freaked me out was this - if bean sprouts grow up to be beans, and alfalfa sprouts grow up to be alfalfa, then what do brussels sprouts grow up to be? Also, I never had fresh brussels sprouts till I was an adult. I only had the frozen variety that you dumped in boiling water, or steamed in a microwave. Yet, I still loved them, preferably soaked in butter.


As an adult I've experimented with fresh brussels sprouts: steaming, roasting, sautéing, with bacon - they're all good, but this has been my favorite "go-to" recipe for a while.


(shown with roasted pepper quinoa)


Ingredients:


  • Olive oil
  • 1/2 cup yellow onion, sliced thin
  • 1/2 cup sliced mushrooms (I use baby portabellas)
  • 1 pound fresh brussels sprouts, trimmed, cleaned and cut in half
  • 1 cup vegetable stock
  • 1/4 cup butter (optional)
  • 1 tablespoon cider vinegar (optional)
  • Salt
  • Coarse sea salt for garnish


In large skillet (with tight fitting lid), heat 2 tablespoons olive oil over medium high heat and saute onions till soft. Add mushrooms and saute for 3-4 minutes till soft. Reduce heat to medium and move onions and mushrooms to sides of skillet and place brussels sprouts, cut side down in skillet. Let them cook without turning for 2-3 minutes, or until they sear to a golden brown. Toss brussels sprouts and mushroom/onion mixture together, seasoning with salt for 2-3 minutes, then add the vegetable stock directly to the mixture and cover, allowing the mixture to steam for 5 minutes. Uncover, toss the mixture a few times (adding optional butter and cider vinegar) and serve garnished with a sprinkling of coarse sea salt.


Consider making a double order and use the rest for Brussels Sprouts Paninis!

Monday, October 31, 2011

Mise en Place

If you watch any cooking shows, eventually you'll hear a strange French term - Mise en Place (meez-on-plahs). This translates to "putting in place" or "everything in place." This simply refers to making sure your prep work is done before you start to cook - the meat and vegetables are cleaned, portioned or measured and cut to size, each in it's own separate container. The spices and dry ingredients are pre-measured and placed in small ramekins or cups. The oven and grill are preheated, the pans are heating. The oils, butters and stocks are all portioned out.


While some may say that this adds too much time to your already-over-scheduled life, not to mention all the extra containers that need to be cleaned up afterward, my experience has been that the effort is not only worth it, but it also saves time in the long run, and prevents discovering at the most inopportune moment that you are missing a crucial ingredient.


Like most home cooks, for a long time, my preferred method of cooking was to pull some things out of the fridge or pantry, set them on the counter and then start going. I figured I would wash, peel and chop vegetables as I needed them, and measure out ingredients on the fly. Inevitably I would discover I was low or completely out of an ingredient, requiring me to make a trip to the store while my half-cooked meal wilted on the stove, or I would just skip that ingredient. I would discover that I needed to wash and dry measuring utensils as I was going. Cooking became a chore, and the results were oftentimes less than desirable. Once I discovered the importance of making sure I had "everything in place" before I started cooking, the process was less stressful, and the results were fantastic!

Vegetable Stock

Wow...I can't believe it's been over 2 months since my last blog post. Life's been busy, and I've been trying to adjust to my wife's decision to step beyond being vegetarian, and move into being vegan. Of course, this happened right after I discovered how to make homemade paneer (an Indian cheese, which I'll blog about later). Despite my initial resistance, I'm slowly embracing her choice.


In the fall and winter months I like to make soups. The key to a good soup is to start with a good stock. Though it's possible to buy stock from the grocery, I prefer to make my own. Stock is fairly easy to make, but it takes a bit of time. Fortunately, once the ingredients are prepared, it's just a matter of letting it simmer. Today, we're looking at making Vegetable Stock. This recipe is one I've been using for a while, but feel free to use vegetables you have on hand, and your favorite seasonings. If you know you're going to be making stock, try saving some of your vegetable scraps from other meals you prepare (once they've been cleaned of course!). 


Not only do I use this for soups, but also for making rice, beans, quinoa, as a braising liquid for kale and heartier vegetables like brussels sprouts, as the base for sauces, etc. Basically, most places where you use water, you can substitute stock to add additional depth to your flavors.


Ingredients:


  • 2 Tablespoons vegetable oil
  • 2 cups celery, coarsely chopped (approx. 4 ribs)
  • 2 cups carrots, peeled and coarsely chopped (approx. 4 carrots) 
  • 1 cup broccoli stems, trimmed, peeled and coarsely chopped (approx. 2 stems)
  • 1 medium onion, coarsely chopped (I leave as much of the onion skin on as possible for color)
  • 1 cup sliced mushrooms (I use baby portabellas)
  • 2 large cloves garlic, coarsely chopped
  • 2 Tablespoons ginger, peeled and coarsely chopped)
  • small bunch parsley/cilantro
  • 1 Tablespoon kosher salt
  • 1 Tablespoon black peppercorns
  • 1 Tablespoon whole coriander
  • 1/2 Tablespoon whole mustard seed
  • 2 bay leaves
  • 8 cups water


In large stock pot, heat oil over medium heat and sweat all vegetables except mushrooms and cilantro. 


Once vegetables and aromatics become fragrant and release some of their moisture (approx. 10 minutes) add water and remaining ingredients. Bring to boil and reduce to simmer for 30 minutes. Remove from heat and let ingredients continue to "steep" in water for 20 minutes - 1 hour. 


Strain stock through fine mesh sieve or china cap. Makes approx. 8 cups stock. Refrigerate and use within 1 week, or freeze in ice cube trays for later use.


Monday, August 22, 2011

Great Interview with Alice Waters

Wow - between vacation and prepping for my upcoming Yoga Teacher Training, I've fallen behind on my blogging.


Hopefully I'll have some more tasty recipes and random stray thoughts coming soon, but in the meantime I wanted to let you know about a wonderful interview I heard on NPR today with Alice Waters, owner of Chez Panisse in Berkeley, CA.


Alice Waters was at the vanguard of the "local, sustainable" food movement. Over the past 40 years she has cultivated partnerships with local farmers, ranchers and other providers who are all passionate about fresh, seasonal, organic food. She has also started a foundation to bring healthful, local food to schoolchildren with a program called "Edible Schoolyards." 


While I do enjoy the convenience and cost-effectiveness of shopping at large supermarkets, I do try to support local growers at farmer's markets and other shops that source locally. Honestly, I could really do more along those lines - convenience usually wins out - but I want to make an effort to do better in that area. One thing I do, though, is do most of my shopping around the perimeter of the store, and only get 20-30% of my groceries from the aisles. Even then, I try to focus on ingredients rather than prepared foods. The perimeter of the store is where the fresh produce, meats, cheeses, dairy and even baked goods are usually kept. I focus on the aisles where you find rice, beans, canned tomatoes, pasta, etc. Things that  you use to MAKE delicious dishes. I would say that only about 5% of my grocery cart is filled with prepared foods, and usually "snack" or "dessert" things like ice cream, chips or sometimes a particularly yummy looking cake. 


There's a difference in the way you relate to food when you take the time to gather it thoughtfully and with intention, even if "gathering" it means taking your time to choose the freshest, juiciest apple from the entire bin of apples in front of you. The food stops being a disposable commodity designed to fill your belly, and takes on the quality of being something that nourishes you or your loved ones. When you actually meet and chat with the person who grew the apple at your local market, though, you develop a reverence and respect for the food, and take time to lovingly prepare it. 


I hope you take the time to listen to the interview linked above - it may change the way you think about food forever.