Labels

Tuesday, December 11, 2012

Thai Sweet Potato Soup

I've been really negligent. Last posting was back in February. I'd love to say that many wonderful, exciting things have been keeping me from posting, but it's just regular ol' life. Bad blogger...bad, bad blogger.

But, the good news is, I've been cooking quite a bit! I've got a few recipes and other information I'm hoping to catch up on, so here we go...

Believe it or not I do make more things than soup, but given the season, I thought I'd tiptoe back into the water with a wonderful little concoction that was inspired by a package of store-bought Pacific brand Thai Sweet Potato Soup.

I first tried a carton of this that I found at my local grocers. The velvety tanginess of the interplay between sweet potatoes and lemongrass intoxicated me, and I knew that I would have to try to make it. After looking around, I found a recipe that sounded pretty close, so I used that as a jumping off point, and added my own spin to it.

Thai Sweet Potato Soup


Ingredients

  • 6 cups Vegetable Stock (eliminate the mushrooms and broccoli stems, and add in 2 stalks lemongrass, peeled, trimmed and cut into 3" long pieces and 1 T cardomom pods)
  • 2 pounds sweet potatoes, roasted, peeled and diced (divide in half)
  • 2 T fresh ginger, minced
  • 1 med onion, diced
  • 6 cloves garlic, minced
  • 4 stalks lemongrass, trimmed and cut into 3-4 inch lengths, divided
  • 1 can Coconut milk
  • Chili Paste
  • Curry Paste (I used powder)
  • Brown Sugar
  • olive or vegetable oil
  • Lime (optional)
  • Cilantro or Thai Basil (optional)


Roasted Sweet Potatoes
Preheat oven to 400 and roast 2 # sweet potatoes for 40 min (or until easily pierced with fork). Peel and finely cube them. Set 1/2 of the cubed sweet potatoes aside.

Soup
  1. In stockpot, sauté onions, garlic and ginger in olive or vegetable oil until translucent
  2. Add lemongrass, stock and half of the sweet potatoes and bring to  boil, then reduce to simmer for 10-15 minutes
  3. Remove lemongrass stalks and set aside (we’ll add them in again)
  4. Using immersion blender or food processor, puree the soup mixture until smooth
  5. Add coconut milk, 2-3 teaspoons of curry paste/powder, 1-2 teaspoons of chili paste and 1-2teaspoons brown sugar. Blend together, taste and adjust seasonings (Warning: Curry paste/powder and chili paste tend to start off relatively mild, then increase in flavor/spiciness over time. My first attempt I forgot this, and got a soup that was nearly too spicy to eat after the flavors had a chance to develop).
  6. Add in remaining sweet potatoes and re-add lemongrass
  7. Bring to boil, then reduce and let simmer for 30 minutes
  8. Remove lemongrass stalks and discard. Serve soup garnished with fresh lime and cilantro or Thai basil
Enjoy this with some nice crusty bread or an Asian-inspired salad.


Tuesday, February 21, 2012

What the Pho?

I admit it...I've been a little obsessed with Pho (pronounced "fuh") of late. Ever since I saw one of the Top Chef cheftestants make it, I've been wanting to try it. I found a vegan recipe of Pho online, but since I hadn't actually tasted it anywhere, wanted to wait till I had tried it before I tried making it. So, I found the website Pho Fever and searched for restaurants in Indianapolis that serve this tasty Vietnamese noodle soup, and so far I've only tried two of them. But I'm in love with this flavorful, aromatic bowl of yumminess! I must say that I do enjoy the traditional beef version, however since I'm trying to be supportive of my vegan wife, here's the version for the non-meat-eaters:


Pho (serves 4)


Broth

  • 8 cups Vegetable Stock
  • 3 Tablespoons Low Sodium Soy Sauce (you can use the full sodium variety, or substitute Bragg's liquid amino's)
  • 8 cloves garlic, peeled and coarsely chopped
  • 1 small onion, diced
  • 1 inch gingerroot, peeled and coarsely chopped
  • 2 cinnamon sticks
  • 2 star anise pods
  • 2 large bay leaves


Soup Ingredients

  • 1 lb rice noodles
  • 8 oz. seitan or tofu, drained and cut into bite size pieces OR
  • 1 sliced portabella mushroom
  • 1/2 cup bean sprouts
  • 1/2 cup Thai basil leaves (stems removed)
  • 1/2 cup shredded cabbage
  • 1/2 cup fresh cilantro (stems removed)
  • 3 scallions, sliced
  • 1 green chile or jalapeno pepper, sliced thin
  • 1 lime cut into wedges
  • Sriracha Sauce
  • Soy Sauce
  • Hoisin Sauce


  1. Place Vegetable Stock, Soy Sauce, garlic, ginger and onion into large stock pot and bring to low boil
  2. Once broth comes to a boil, reduce to simmer and add cinnamon, anise and bay leaves. Simmer for 25-30 minutes, then remove the solids with fine mesh skimmer or slotted spoon (or strain broth through strainer)
  3. In separate sauce pan, bring 4 cups water to boil, then turn heat off and add rice noodles. Stir frequently until they are tender. Drain and divide them into 4 large bowls
  4. Prepare seitan, tofu or mushrooms and layer them on top of noodles in bowls
  5. Clean and prepare cabbage and scallions and layer in bowls on top of noodles and protein
  6. Clean and de-stem Thai basil and cilantro, slice pepper and cut lime into wedges, and arrange onto a platter or in separate bowls with the bean sprouts
  7. Making sure broth is steaming hot, ladle about 2 cups of broth over the noodles in each bowl. Serve immediately with the platter of garnishes and the Sriracha, Soy and Hoisin sauces. 
  8. Each person flavors their own bowl with whichever garnishes they want, stirring the soup gently till ingredients "cook" in the broth. 


Be sure to squeeze a little lime in to give the soup a little zing! Oh, and you may want to just go ahead and double the recipe...I ended up using a bit more broth in each bowl 'cuz it's so tasty! Besides, it's really good the second day!


Sunday, January 8, 2012

White Bean & Kale Soup

When I was a kid, my grandmother used to make a navy bean soup with ham. I used to look forward to that with some homemade cornbread dripping with butter. Nothing was better on a winter's day.


Even though this has been a mild January, I was inspired by that memory of my grandmother's soup this week, and started craving a different type of bean soup - White Bean and Kale. This perfect-for-winter soup is rich, hearty and goes well with cornbread, a good crusty roll or any other bread that you can use to sop up the wonderful broth. Plus, it smells amazing when cooked all day in the crock pot. Here's my vegan-style take on this Italian classic:


White Bean and Kale Soup


Ingredients:

  • 1 pound dry cannellini beans (sorted and soaked overnight)
  • 2 tablespoons olive oil
  • 2 stalks celery, finely diced
  • 2 small onions, coarsely chopped
  • 2 cups carrots, coarsely chopped
  • 4 cloves garlic, minced
  • 5 cups vegetable stock
  • 1 quart water
  • 3 teaspoons sea salt
  • 1/2 teaspoon freshly ground black pepper
  • 1 teaspoon fresh rosemary, chopped
  • 1 large bunch kale, stems and center ribs discarded, coarsely chopped


  1. Heat olive oil in saute pan over medium high heat, and saute celery and onions together with one teaspoon of the salt till soft and fragrant (5 minutes)
  2. Add garlic and saute for one minute
  3. Place soaked beans, stock, water, the onion/celery/garlic mixture and the rest of the ingredients (EXCEPT the kale!) in the crock pot, give it a stir, cover and cook for 6-8 hours
  4. Add the kale in for the last 15-20 minutes so that it becomes tender without overcooking
  5. Adjust seasonings and enjoy with some good bread


If you don't have a crock pot, place ingredients in large stock pot. Bring everything to a boil, then reduce to simmer for about an hour  uncovered (until beans are tender). Add kale for last 15-20 minutes.

For non-vegans/vegetarians, add a good sized piece (2-3 inches) of Parmigianna cheese rind to the soup while it's cooking, and maybe add in some sliced, browned smoked sausage as well.

(Note: Like most soups, this is best if made a day or two ahead. Be sure to cool soup completely uncovered, then refrigerate covered. If the soup becomes too thick, you can thin it with a little water or vegetable stock.)

Monday, January 2, 2012

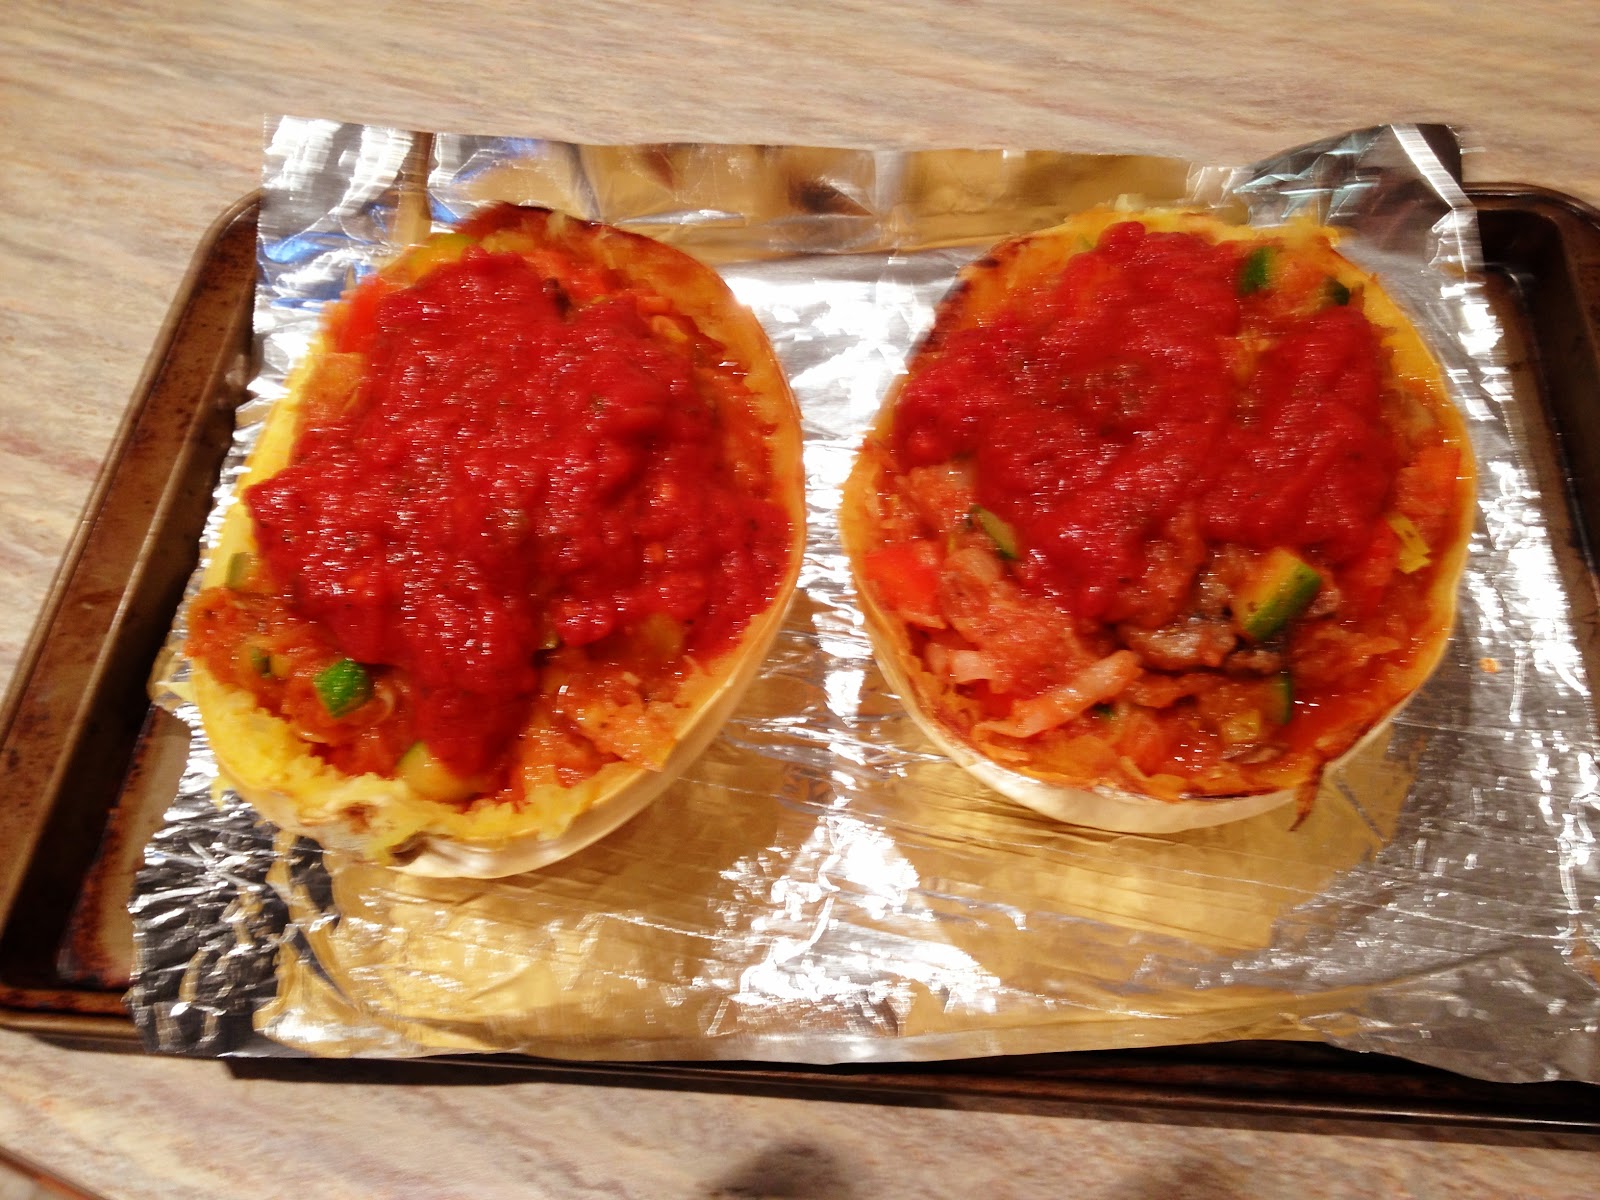
Vegan Spaghetti Squash Casserole

OK, I know the word "casserole" brings up visions of church basement suppers and family get-togethers, but this one has a little twist in that the shell of the spaghetti squash becomes the dish that it's served in. I saw a version of this topped with mozzarella and parmesan cheeses on Diners, Drive-Ins and Dives (Guy Fieri rocks!) and decided to give it a shot, with a vegan twist. It's a pretty easy recipe, and super-tasty!


Vegan Spaghetti Squash Casserole


Ingredients:


  • 1 medium-to-large spaghetti squash
  • Extra virgin olive oil
  • 2 cloves garlic, minced
  • 1 large zucchini, diced
  • 1 cup mushrooms, sliced
  • 1 red bell pepper, diced
  • 1 leek, sliced (white and green parts)
  • 1 24 oz. jar vegan marinara sauce
  • 1 cup vegan panko bread crumbs
  • Salt and pepper


1. Preheat oven to 375
2. With sharp knife, carefully cut spaghetti squash in half lengthwise and scrape out seeds
3. Bake, cut-side down, on foil-lined cookie sheet for approx. 40 minutes (once you can pierce flesh with fork, it is done)
4. Let squash cool for approx. 10 minutes, then using fork, carefully scrape out "strands" of squash into a bowl moving from end to end, leaving about 1/4 inch of the squash in the shell (not only will this provide structure to the shells when they are being baked, but it's also very satisfying to scrape the "spaghetti" from the shell as you eat). Retain the squash shell halves.

5. In large saute pan, heat 2 tablespoons olive oil over medium-high heat
6. Saute garlic in oil until fragrant, taking care not to burn

7. Saute zucchini and mushrooms until just tender (approx. 5 minutes)

8. Add a dash of salt and diced red pepper and continue sautéing approx. 5 minutes

9. Add leeks and continue to saute until leeks soften and begin to wilt

10. Add in approx. 1 1/2 cups of marinara and toss till mixed

11. Add spaghetti squash and toss with vegetable mixture, adding just enough sauce to coat mixture and adding salt and pepper to taste

12. Divide mixture into squash shells, topping with remainder of marinara sauce

13. Mix panko bread crumbs with approx. 2 tablespoons of olive oil (panko should be moistened, but not mushy)
14. Spread bread crumb mixture over top of "casseroles" (sorry about the blurry photo - I was getting excited!)

15. Bake at 375 for 20-30 minutes (panko bread crumbs should be golden brown and toasty and marinara should be bubbly)
16. Carefully remove each "casserole" to plates and enjoy! (no photos available - we ate it too fast!)

Friday, December 30, 2011

Brussels Sprouts Panini

I hope you took my recommendation to make extra brussels sprouts, because this is my favorite way to eat the leftovers! It's a very simple, healthy lunch served with a fresh salad.


Ingredients:

  • 6" baguette, italian roll or other crusty bread
  • 1 cup leftover Brussels Sprouts
  • 2 slices Provolone cheese
  • 2 tablespoons extra virgin olive oil
  • Cooking spray


Preheat a sandwich press or panini grill to medium high. Slice bread in half lengthwise and drizzle with olive oil. Place 2 slices of Provolone cheese on bread, then arrange brussels sprouts on top of cheese. Press sandwich lightly with your hands, then place on grill sprayed with cooking spray. Close sandwich press and grill for 3-4 minutes, remove and slice in half on diagonal. Yum!

The BEST Brussels Sprouts

I admit it...brussels sprouts used to freak me out. Don't get me wrong, I've always LOVED these tasty little morsels, even as a kid. I used to pretend that I was eating miniature cabbages.


What freaked me out was this - if bean sprouts grow up to be beans, and alfalfa sprouts grow up to be alfalfa, then what do brussels sprouts grow up to be? Also, I never had fresh brussels sprouts till I was an adult. I only had the frozen variety that you dumped in boiling water, or steamed in a microwave. Yet, I still loved them, preferably soaked in butter.


As an adult I've experimented with fresh brussels sprouts: steaming, roasting, sautéing, with bacon - they're all good, but this has been my favorite "go-to" recipe for a while.


(shown with roasted pepper quinoa)


Ingredients:


  • Olive oil
  • 1/2 cup yellow onion, sliced thin
  • 1/2 cup sliced mushrooms (I use baby portabellas)
  • 1 pound fresh brussels sprouts, trimmed, cleaned and cut in half
  • 1 cup vegetable stock
  • 1/4 cup butter (optional)
  • 1 tablespoon cider vinegar (optional)
  • Salt
  • Coarse sea salt for garnish


In large skillet (with tight fitting lid), heat 2 tablespoons olive oil over medium high heat and saute onions till soft. Add mushrooms and saute for 3-4 minutes till soft. Reduce heat to medium and move onions and mushrooms to sides of skillet and place brussels sprouts, cut side down in skillet. Let them cook without turning for 2-3 minutes, or until they sear to a golden brown. Toss brussels sprouts and mushroom/onion mixture together, seasoning with salt for 2-3 minutes, then add the vegetable stock directly to the mixture and cover, allowing the mixture to steam for 5 minutes. Uncover, toss the mixture a few times (adding optional butter and cider vinegar) and serve garnished with a sprinkling of coarse sea salt.


Consider making a double order and use the rest for Brussels Sprouts Paninis!

Monday, October 31, 2011

Mise en Place

If you watch any cooking shows, eventually you'll hear a strange French term - Mise en Place (meez-on-plahs). This translates to "putting in place" or "everything in place." This simply refers to making sure your prep work is done before you start to cook - the meat and vegetables are cleaned, portioned or measured and cut to size, each in it's own separate container. The spices and dry ingredients are pre-measured and placed in small ramekins or cups. The oven and grill are preheated, the pans are heating. The oils, butters and stocks are all portioned out.


While some may say that this adds too much time to your already-over-scheduled life, not to mention all the extra containers that need to be cleaned up afterward, my experience has been that the effort is not only worth it, but it also saves time in the long run, and prevents discovering at the most inopportune moment that you are missing a crucial ingredient.


Like most home cooks, for a long time, my preferred method of cooking was to pull some things out of the fridge or pantry, set them on the counter and then start going. I figured I would wash, peel and chop vegetables as I needed them, and measure out ingredients on the fly. Inevitably I would discover I was low or completely out of an ingredient, requiring me to make a trip to the store while my half-cooked meal wilted on the stove, or I would just skip that ingredient. I would discover that I needed to wash and dry measuring utensils as I was going. Cooking became a chore, and the results were oftentimes less than desirable. Once I discovered the importance of making sure I had "everything in place" before I started cooking, the process was less stressful, and the results were fantastic!

Vegetable Stock

Wow...I can't believe it's been over 2 months since my last blog post. Life's been busy, and I've been trying to adjust to my wife's decision to step beyond being vegetarian, and move into being vegan. Of course, this happened right after I discovered how to make homemade paneer (an Indian cheese, which I'll blog about later). Despite my initial resistance, I'm slowly embracing her choice.


In the fall and winter months I like to make soups. The key to a good soup is to start with a good stock. Though it's possible to buy stock from the grocery, I prefer to make my own. Stock is fairly easy to make, but it takes a bit of time. Fortunately, once the ingredients are prepared, it's just a matter of letting it simmer. Today, we're looking at making Vegetable Stock. This recipe is one I've been using for a while, but feel free to use vegetables you have on hand, and your favorite seasonings. If you know you're going to be making stock, try saving some of your vegetable scraps from other meals you prepare (once they've been cleaned of course!). 


Not only do I use this for soups, but also for making rice, beans, quinoa, as a braising liquid for kale and heartier vegetables like brussels sprouts, as the base for sauces, etc. Basically, most places where you use water, you can substitute stock to add additional depth to your flavors.


Ingredients:


  • 2 Tablespoons vegetable oil
  • 2 cups celery, coarsely chopped (approx. 4 ribs)
  • 2 cups carrots, peeled and coarsely chopped (approx. 4 carrots) 
  • 1 cup broccoli stems, trimmed, peeled and coarsely chopped (approx. 2 stems)
  • 1 medium onion, coarsely chopped (I leave as much of the onion skin on as possible for color)
  • 1 cup sliced mushrooms (I use baby portabellas)
  • 2 large cloves garlic, coarsely chopped
  • 2 Tablespoons ginger, peeled and coarsely chopped)
  • small bunch parsley/cilantro
  • 1 Tablespoon kosher salt
  • 1 Tablespoon black peppercorns
  • 1 Tablespoon whole coriander
  • 1/2 Tablespoon whole mustard seed
  • 2 bay leaves
  • 8 cups water


In large stock pot, heat oil over medium heat and sweat all vegetables except mushrooms and cilantro. 


Once vegetables and aromatics become fragrant and release some of their moisture (approx. 10 minutes) add water and remaining ingredients. Bring to boil and reduce to simmer for 30 minutes. Remove from heat and let ingredients continue to "steep" in water for 20 minutes - 1 hour. 


Strain stock through fine mesh sieve or china cap. Makes approx. 8 cups stock. Refrigerate and use within 1 week, or freeze in ice cube trays for later use.


Monday, August 22, 2011

Great Interview with Alice Waters

Wow - between vacation and prepping for my upcoming Yoga Teacher Training, I've fallen behind on my blogging.


Hopefully I'll have some more tasty recipes and random stray thoughts coming soon, but in the meantime I wanted to let you know about a wonderful interview I heard on NPR today with Alice Waters, owner of Chez Panisse in Berkeley, CA.


Alice Waters was at the vanguard of the "local, sustainable" food movement. Over the past 40 years she has cultivated partnerships with local farmers, ranchers and other providers who are all passionate about fresh, seasonal, organic food. She has also started a foundation to bring healthful, local food to schoolchildren with a program called "Edible Schoolyards." 


While I do enjoy the convenience and cost-effectiveness of shopping at large supermarkets, I do try to support local growers at farmer's markets and other shops that source locally. Honestly, I could really do more along those lines - convenience usually wins out - but I want to make an effort to do better in that area. One thing I do, though, is do most of my shopping around the perimeter of the store, and only get 20-30% of my groceries from the aisles. Even then, I try to focus on ingredients rather than prepared foods. The perimeter of the store is where the fresh produce, meats, cheeses, dairy and even baked goods are usually kept. I focus on the aisles where you find rice, beans, canned tomatoes, pasta, etc. Things that  you use to MAKE delicious dishes. I would say that only about 5% of my grocery cart is filled with prepared foods, and usually "snack" or "dessert" things like ice cream, chips or sometimes a particularly yummy looking cake. 


There's a difference in the way you relate to food when you take the time to gather it thoughtfully and with intention, even if "gathering" it means taking your time to choose the freshest, juiciest apple from the entire bin of apples in front of you. The food stops being a disposable commodity designed to fill your belly, and takes on the quality of being something that nourishes you or your loved ones. When you actually meet and chat with the person who grew the apple at your local market, though, you develop a reverence and respect for the food, and take time to lovingly prepare it. 


I hope you take the time to listen to the interview linked above - it may change the way you think about food forever.

Sunday, July 31, 2011

Zucchini Noodles with Mushrooms and Pesto

Most of my favorite meals happen as the result of me looking in my fridge and seeing what kinds of leftovers and unused (but still fresh!) produce I have on hand. A few days ago, I had some leftover pesto sauce, some sliced portabella mushrooms and some zucchini. Add in some garlic and onions, and you have a light, healthy, nutritious meal.


Zucchini Noodles with Mushrooms and Pesto


1/2 cup Basic Pesto Sauce
3-4 medium zucchini
1 cup sliced baby portabella mushrooms (or any other mushroom you have)
1/2 medium yellow onion, sliced
2 cloves garlic
salt
olive oil
Fresh grated Parmesan Cheese (optional)


Start by slicing zucchini into Zucchini Noodles with a mandoline slicer. In large skillet, heat 2 tablespoons olive oil over medium heat. Toss in garlic, sliced onion and a bit of salt and cook till soft and onion is becoming translucent. Increase heat to medium high, and add in mushrooms and sautee until tender (2-3 minutes). Add in Zucchini Noodles and CAREFULLY sautee until tender (5 minutes). REMEMBER: NEVER handle your zucchini roughly! Add in Pesto Sauce and toss till thoroughly coated. Adjust salt and serve, topping with freshly grated Parmesan Cheese.

Zucchini Noodles

Zucchini is one of my favorite vegetables. It's a great workhorse and can be used in a variety of different cuisines as a main course, as a side dish, in a stir fry, fried, sliced, diced, sauteed, roasted, grilled, steamed. The list is endless. One of my favorite ways to use zucchini is as a substitute for noodles either in a side dish or as a main course. This does require a special tool called a mandoline (and not one of those 8-stringed instruments you find in folk, bluegrass and Godfather music. My mandoline slicer is over 10 years old, cost about $25 at the time, and isn't fancy, but it gets the job done!


Zucchini Noodles


3-4 medium zucchini, washed (you could peel the skin off if you'd like, but I prefer to leave it on.)


Fit the mandoline slicer with the small julienne blade. 


 Cut the ends off the zucchini, and lay it, lengthways, on the mandoline. Place the hand guard on top of the zucchini, and in smooth, even strokes, run the zucchini over the julienne blades.


 The result will be long, thin strips of zucchini about the size of spaghetti.

Zucchini noodles can be added raw to salads, cooked into an omelette, steamed or sauteed in a bit of oil till they are soft and used as a substitute for pasta. Be careful, though, as the zucchini can easily break into small bits if handled roughly. And NOBODY's zucchini should ever be handled too roughly!

Spicy Peanut Sauce

Spicy Peanut Sauce
I posted this as part of a recipe, then realized that it would be good to include it as a stand-alone. After all, Spicy Peanut Sauce can be used in a variety of dishes like stir frys, noodles, chicken wings, lettuce wraps, etc. Spicy Peanut Sauce rocks.

2 tablespoons vegetable oil
3 scallions, chopped fine
1 garlic clove, chopped fine
1 tablespoon finely grated peeled fresh ginger root
1 cup coconut milk
1/2 cup creamy or chunky peanut butter (I used creamy JIF)
1/4 cup soy sauce
zest and juice of 1/2 lime (may increase this to taste)
3 tablespoons firmly packed brown sugar
1/4 teaspoon dried hot red pepper flakes
Sriracha chili sauce (to taste)

In a saucepan heat oil over moderate heat until hot but not smoking and cook scallions, garlic and ginger, stirring, until fragrant, about 1 minute. Stir in remaining ingredients and bring to a simmer, stirring. Simmer sauce, stirring, until smooth and cool to room temperature. Sauce may be made up to 3 days ahead and chilled, covered. If sauce is too thick after chilling, stir in 1 to 2 tablespoons hot water until sauce reaches desired consistency.


Tuesday, July 26, 2011

Pesto Cream Sauce

This is fabulous over ravioli, tortellini, and just about any other filled pasta.

Pesto Cream Sauce
2 Tablespoons butter
1/2 cup Basic Pesto Sauce (without cheese added)
1/2 cup Heavy Cream
1 cup freshly grated parmesan cheese
1/2 tsp nutmeg
salt and pepper


Melt butter in skillet over medium heat. Add pesto sauce and stir until butter and sauce are blended. Slowly add heavy cream, stirring frequently until pesto is mixed in with cream, and steam begins to appear (do NOT boil cream!). Slowly add parmesan cheese until it melts and sauce thickens. Add nutmeg, salt and pepper. More cream may be added if sauce gets too thick, or more cheese can be added if you like sauce a bit thicker.

Pesto Basics

Many of us remember significant firsts in our lives - first car, first girl/boyfriend, first...well...you get the idea. I remember my first taste of pesto as if it's yesterday. It was when I worked for Houlihan's Olde Place restaurant back in the early '80's. We had a pizza on the menu which featured pesto sauce instead of tomato sauce, along with artichoke hearts, black olives, tomatos, slivered almonds and a few ingredients I'm forgetting. But, like Macho Grande, I'll never be over that pesto. Herbacious, garlicky, nutty...I was hooked. I mistakenly tried to make it with dried basil once. Once.


Basic Pesto Sauce

  • 3 cups FRESH basil leaves (stems removed), rinsed and dried
  • 2-4 cloves garlic, roughly chopped
  • 1 cup pine nuts or walnuts
  • 1 cup extra virgin olive oil
  • 1 cup freshly grated parmesan cheese
  • salt and freshly ground pepper


Place basil, garlic (start with about 1/2) and nuts in food processor and blend, adding oil slowly, until it forms a liquid-y paste (when you stop blending, a little bit of the oil should begin to pool). Add salt and pepper to taste, and more garlic if you wish. Remove to bowl, and fold in parmesan cheese. Taste and adjust seasonings.
(photo from Google Images)


HINT: I usually wait to add cheese until after I toss the sauce with pasta, otherwise the cheese will melt and get clumpy. Also, pesto freezes well, but not if the cheese is already added in.


For the more Adventurous: 
For a "crudo style" pesto, instead of using a food processor, finely chop the basil, crush the garlic and nuts together in a mortar and pestle, and then mix all ingredients together in bowl, adding oil bit by bit.


Monday, July 25, 2011

My First Cooking Class

This past Thursday, I attended my first cooking class at Kiss Z Cook, a local store that specializes in offering "tools and techniques for the home cook." I intentionally signed up for their Vegetarian Class to see if I could learn some new techniques or get new ideas for some tasty vegetarian meals. The classes are normally around $75 for a two hour class. All tools and ingredients are supplied for you, there is a staff on hand to do the clean up, and the class is led by a local professional chef. After finishing the meal, everyone sits down and eats what they've just created.


Not knowing what to expect, I got there early. It immediately struck me how hot it was - makes sense, given that we're going to be in an industrial kitchen - but I immediately questioned my sanity for doing this on one of the hottest days of the year (this was during the recent heat wave). I also was a little surprised that the dining area wasn't air conditioned.


Before class, the students are offered water or iced tea, or we could purchase beer or wine. Some people came with friends or spouses, others, like myself, were flying solo.


We were led into the kitchen by the chef, a very affable gentleman named Dwight, and were told that we would be sharing the stations in groups of 3 or 4. Each station was supplied with recipes, a basket of produce, cutting boards, knives and an assortment of bowls and measuring utensils. There is a 4 burner stove and oven at each station as well. In the back of the room is the "common kitchen" where the students could find other pantry items, herbs, stock, etc. to be used in their preparations.


I was grouped with another guy who had taken one other class here, and who seemed to have some cooking experience, and two women who were also both first-timers like me. One of the women was a VERY inexperienced cook, and the other woman seemed like she is the primary cook in her house. We were instructed to look at the recipes, and decide who was going to be cooking what. There were three recipes - grilled eggplant with a vinaigrette, spinach salad with sauteed red pepper and asparagus, and wild mushroom risotto. I was psyched. I've never made risotto, and have always wanted to learn how!


Chef Dwight asked us to all gather around the main teaching station at the front of the room so that he could explain where things were, some tips on strategy, and to demonstrate some basic knife techniques, and how he wanted the vegetables to be cut. He made a special point of noting that he wanted to personally approve our mince of the garlic. He showed us basic onion dicing, and a GREAT technique for breaking down a red pepper that I hope to implement. Then he returned us to our stations.


We all gathered and discussed who would work on what. I mentioned that I'd never done risotto before, and would love to work on that, but for some reason the more experienced woman in our group said that she would do the risotto since she'd made it before. WTF?!? This is a cooking CLASS, not a COMPETITION. I came here to learn something. "You mince the garlic and do the grilled eggplant," she commanded. I didn't want to be a PITA, but I did say that I would really prefer to work on the risotto since I mince garlic and grill eggplant all the time. "You can watch me when I'm making it," she informed me. I was PISSED but decided that digging in my heels on this would just make me look bad, so I grabbed the garlic and started mincing.


I should mention that Chef Dwight wasn't kidding when he said that he was very specific on his garlic mince. I got it as small as I thought I could, called him over to check it, and was told that it still wasn't small enough. So, I minced some more. Finally, after several more passes over the garlic I got the approval. I was relieved to see that others had to redo their mince as well.


The other guy who was in our group was pleasant enough, but kept wanting to chat about what I did for a living, who did most of the cooking in our house, etc. He also kept calling the chef over to check every little thing that he did. The less experienced woman in our group didn't want to do a lot of cooking, instead she hovered over each of us trying to see what we were doing. She did take over sautéing the red pepper and asparagus. She couldn't understand why it wasn't browning, and I suggested that she let the veggies cook a bit between stirs. 


Finally, the time to make the risotto came. Having been busy mincing and grilling, I hadn't been able to observe the prep for the risotto, so I just assumed that "I've made it before" lady had actually read the recipe and understood what she was doing. I immediately realized that not only had she not read through the recipe completely, but that she hadn't even made sure all of her prep was complete.


I also realized that the risotto was not really going to be vegetarian as it was being made with chicken stock. Another "WTF?!?" 


So, risotto-woman cooked off the mushrooms, transferred them to a plate, then tossed the rice into the skillet to begin to cook it. She then started asking us what she was supposed to do next at each step. Totally understandable that she needed someone to prompt her on a recipe that requires a little timing, but she was completely lost. Chef Dwight came over to assist, and the risotto ended up coming out fine.


We all sat down to eat, and I must say that the food came out pretty tasty. That said, overall I was a bit disappointed in the experience, and not just because of my difficulty with my cooking partners. In some ways, it really wasn't their fault.


While Chef Dwight provided some guidance on basic knife techniques, and a good tip on how to determine if a grill is heated to medium, medium high or high, there was very little actual instruction. He circled the room, and jumped in whenever we needed him to, but I would have liked it if he would have been demonstrating as we cooked. At one point I asked him to check the flavor on a vinaigrette that I prepared, and he declined. I had tasted it myself, and thought it was missing something, but without some guidance, I didn't learn what it was. 


I will say that having the clean-up taken care of was a bonus, and Chef Dwight clearly knows what he is doing. He has a good personality for the job as he has a lot of people calling for his help all the time, and he moves around the room with ease. I just wish there were more teaching and instruction. Except for a couple of prep tips, I really didn't learn much. 

Monday, July 18, 2011

Pizza Dough

I've shied away from making my own pizza dough for a long time. Many people have mentioned how easy it is, chefs on cooking shows make it look like a snap, and pizzas made with home-made dough always taste amazing! Why have I avoided this relatively simple technique? One word: Yeast. It scares me. But, it was time to face my fear and give it a shot. And you know what? It was easy. A snap. And it made some pretty tasty pizza crust!


I turned to my standard resource for guidance, Allrecipes.com, then I made some changes:


  • 1 (.25 ounce) package active dry yeast
  • 1 cup warm water (110 degrees F/45 degrees C)
  • 2 cups bread flour
  • 2 tablespoons olive oil
  • 1 teaspoon salt
  • 2 teaspoons white sugar
  • 1 tablespoon dried rosemary
  • 1 tablespoon dried oregano
  • 1 tablespoon garlic powder
  1. In a small bowl, dissolve yeast in warm water. Let stand until creamy, about 10 minutes (this is called "blooming" the yeast - I had no idea what to expect or look for, but after about 10 minutes a cloud of foam suddenly appeared on the surface of the water - very cool!).
  2. In a large bowl, combine 2 cups bread flour, olive oil, salt, white sugar, dried herbs, garlic powder and the yeast mixture; stir well to combine. Beat well until a stiff dough has formed (when the dough starts to form a ball and pull away from the sides of the bowl it's finished). Cover and rise until doubled in volume, about 30 minutes. Pound down, recover bowl and let rise again till doubled in size (another 30 minutes). Meanwhile, preheat oven to 350 degrees F (175 degrees C).
  3. Turn dough out onto a well floured surface. Cut in half and form each half into a round and roll out into a pizza crust shape. Cover with your favorite sauce and toppings and bake in preheated oven until golden brown, about 20 minutes.

(NOTE: if you do not use the dough right away, it can be refrigerated for a few days or frozen)

Roasting Garlic and Onions - Grill Method

Roasting garlic and onions releases the natural sugars contained in these lovely little root vegetables. Plus, using the tin-foil pouch method, you save a lot of clean up. It's easy and takes just minutes.


  1. First, preheat grill to medium high.
  2. Make a pouch out of a sheet of tin foil by folding it in half, then folding over the two side-seams
  3. Place garlic cloves or sliced onions into the pouch, and add approx. 1 tablespoon of olive oil or butter
  4. Fold over top seam of pouch, give it a light shake (praying that the seams are tight) and place directly over the flame on your grill.
  5. Turn every 4-5 minutes for 15-20 minutes, or until you smell the aroma of goodness wafting to your nose
  6. Remove from heat, open pouch and dump the contents into a bowl to either serve with your meal, or use in another recipe.

How to Roast a Pepper

Roasting peppers does several things. First, it mellows out the pepper and allows the natural sweetness of the pepper to shine through. It also adds a smoky flavor to the pepper, which is great for many salsas and sauces. It helps reduce some of the acid and softens the capsaicin, which causes the spiciness in many chili peppers.


Roasting peppers is almost fool-proof. It can be done in an oven, over a grill or even on a gas stove top. Here are a few methods you can use:


In the oven:

  1. Preheat oven to broil
  2. Wash and dry your pepper
  3. Cut pepper in half and remove seeds
  4. Place cut-side down on cooking sheet and spray lightly with cooking oil
  5. Broil until skin wrinkles and bubbles.
  6. Allow pepper to cool, rinse under cold water to remove loose skin and slice


On grill

  1. On gas grill, remove heat shield from one burner (you want the flames to char the skin of the pepper - the heat shield, if you have one, will prevent this). Preheat grill to high.
  2. Over charcoal grill, prepare charcoal and let flames die down and coals to glow red.
  3. Wash and dry pepper.
  4. Place directly over hottest part of grill or directly over coals
  5. Turn every few minutes, allowing the skin to develop black char marks evenly over the pepper
  6. Remove from grill and let cool
  7. Remove stem and run under cool water, removing seeds and charred skin
  8. Slice


On a gas stove top:

  1. Wash and dry your pepper. 
  2. Turn on gas to medium heat. Flames should not be touching pepper.
  3. For large peppers: Lay the pepper directly on the iron grill. Turn every few seconds with tongs until an even roasting has occurred. Skin will be bubbly and wrinkled with black char marks. For smaller peppers: skewer with metal skewer or fork. Hold over flame and rotate peppers every few seconds. Smaller peppers will roast faster than large ones.
  4. Remove to plate and let cool.
  5. Remove stem and run under cool water, removing seeds and charred skin
  6. Slice